Recently, I tried to connect my local directory to GitHub. I am new to programming, and most of the guides I came across were for GitHub pre-Microsoft acquisition. In particular, the personal access tokens were not part of the process, which was confusing. I’m no expert, but thought I would write a quick guide for anyone else frustrated.
Install git
I am assuming some level of computer literacy with this post, so Google anything confusing!
First, we need to install git. Download and install git from this website. Click on downloads, then download the macOS client.
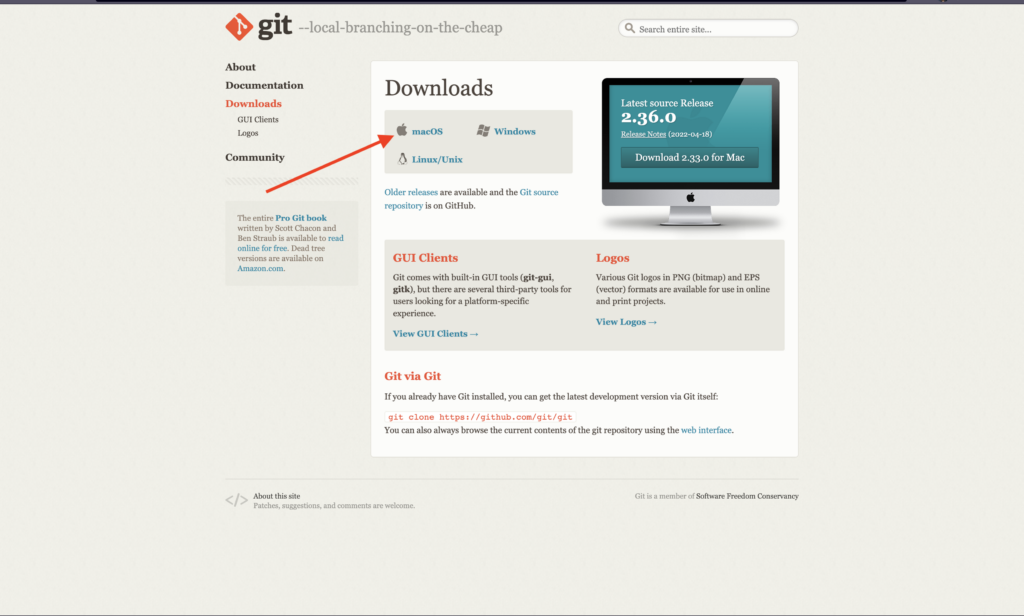
To check if you installed git, open Terminal (I’m using iTerm2, but the preinstalled macOS Terminal works perfect), and type:
git --version
Register on GitHub
Next, we need to register for a free account on GitHub.

Create a Personal Access Token (PAT) For Your Computer
Here’s where the other tutorials were confusing for me. In August 2021, GitHub decided to prevent password authentication using git. Instead, you need to create a Personal Access Token (PAT). Refer to the picture and steps below for the process.
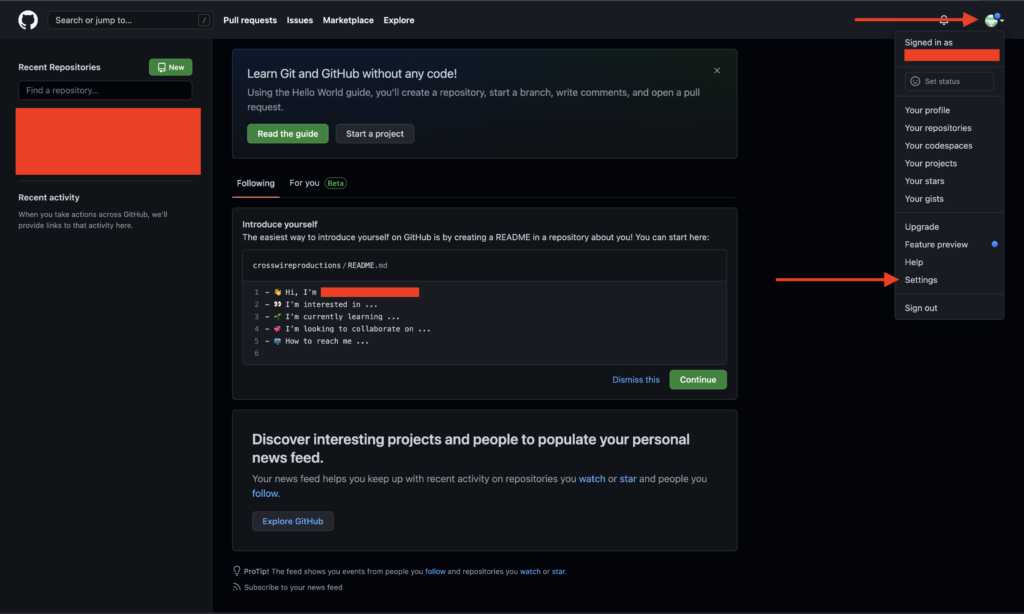
GitHub Settings 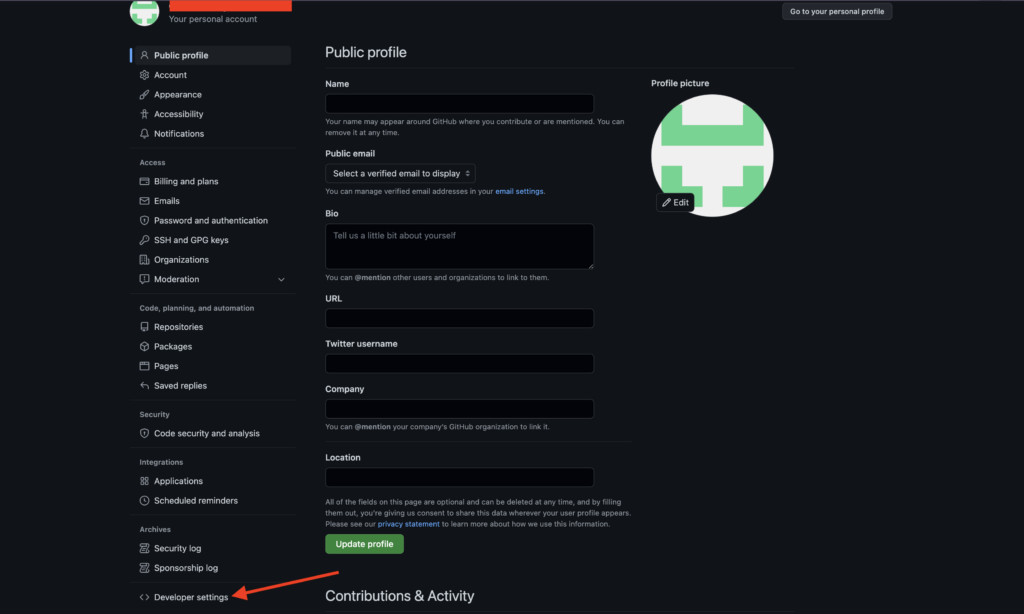
Developer Settings 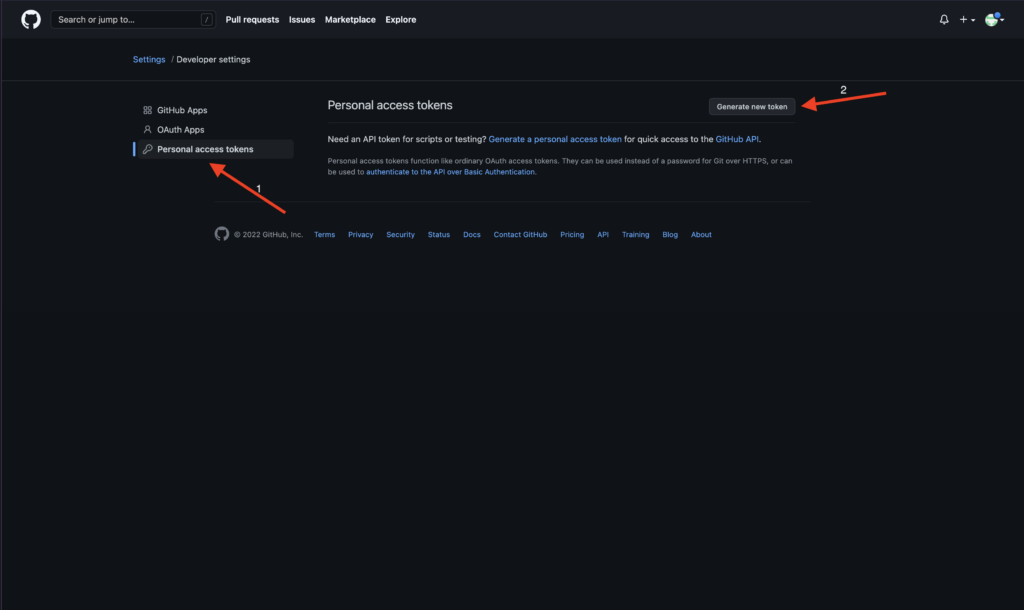
PAT 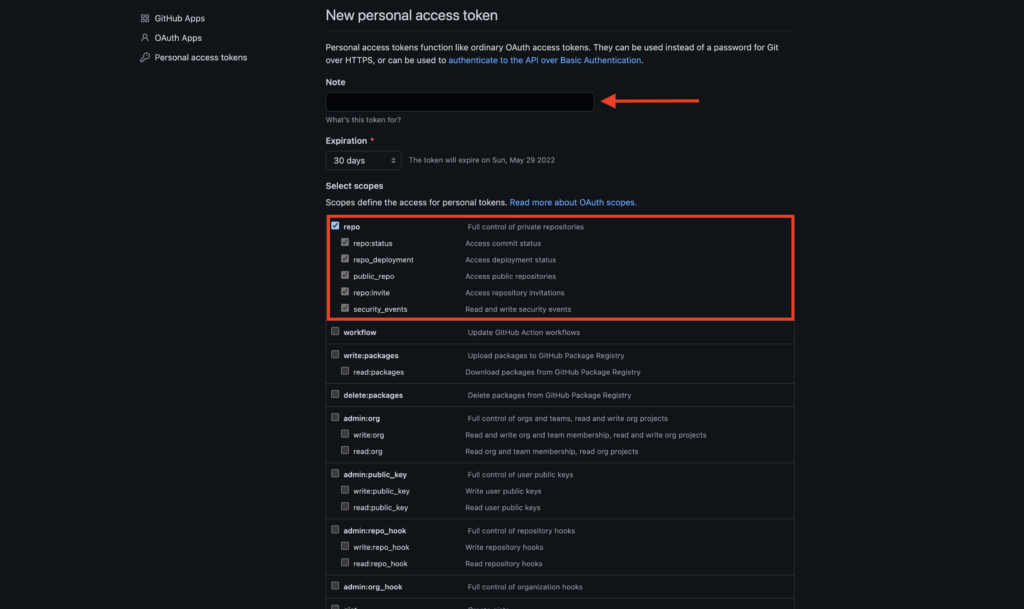
PAT Creation 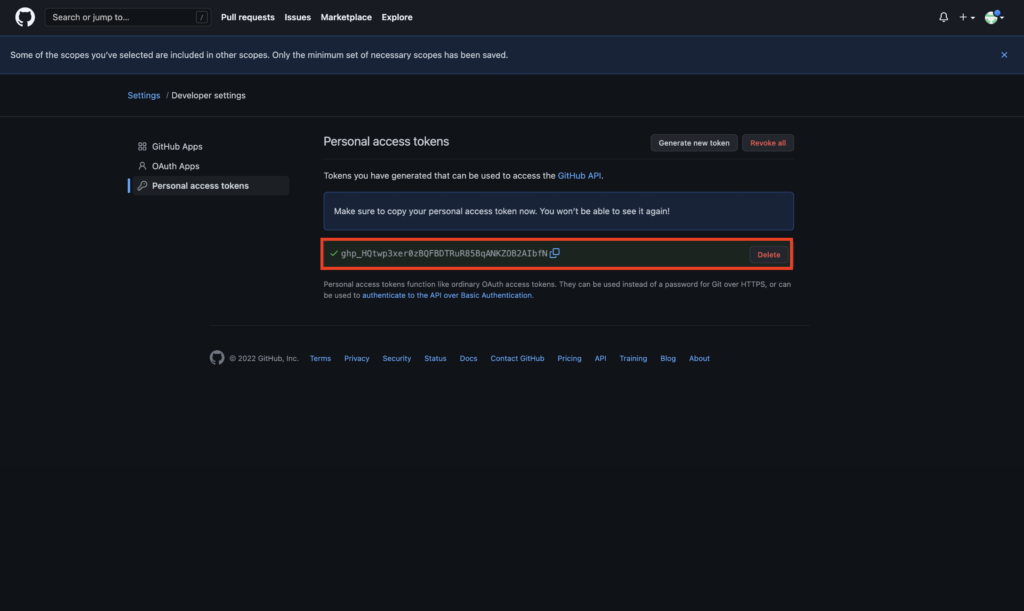
New Token
- Click on your GitHub profile in the top right-hand corner
- Click on “Settings” at the bottom
- Click on “Developer Settings” in the bottom left-hand corner
- Click on “Personal Access Tokens” and “Generate”
- Enter a description for the token, and ensure that at least the first checkbox is ticked
- Click “Generate”
Connect PAT to Keychain Access
Next, you need to put your PAT into the Keychain Access.
Steps to connect to Keychain Access:
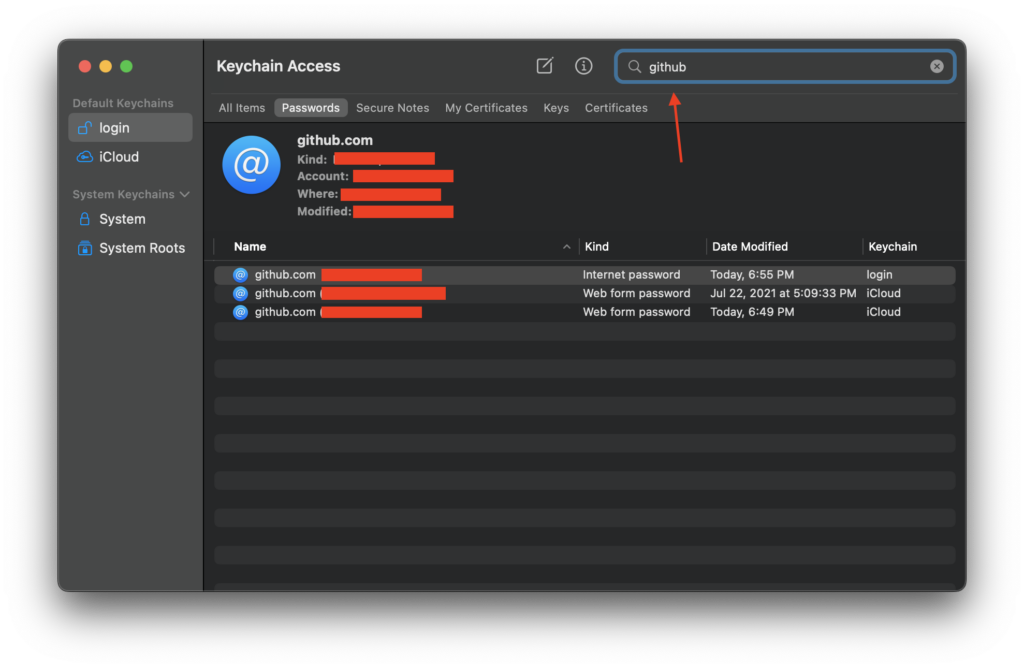
- Press CMD + Space bar, and search for Keychain Access. It will pop up.
- Click on “Passwords” and search for GitHub.
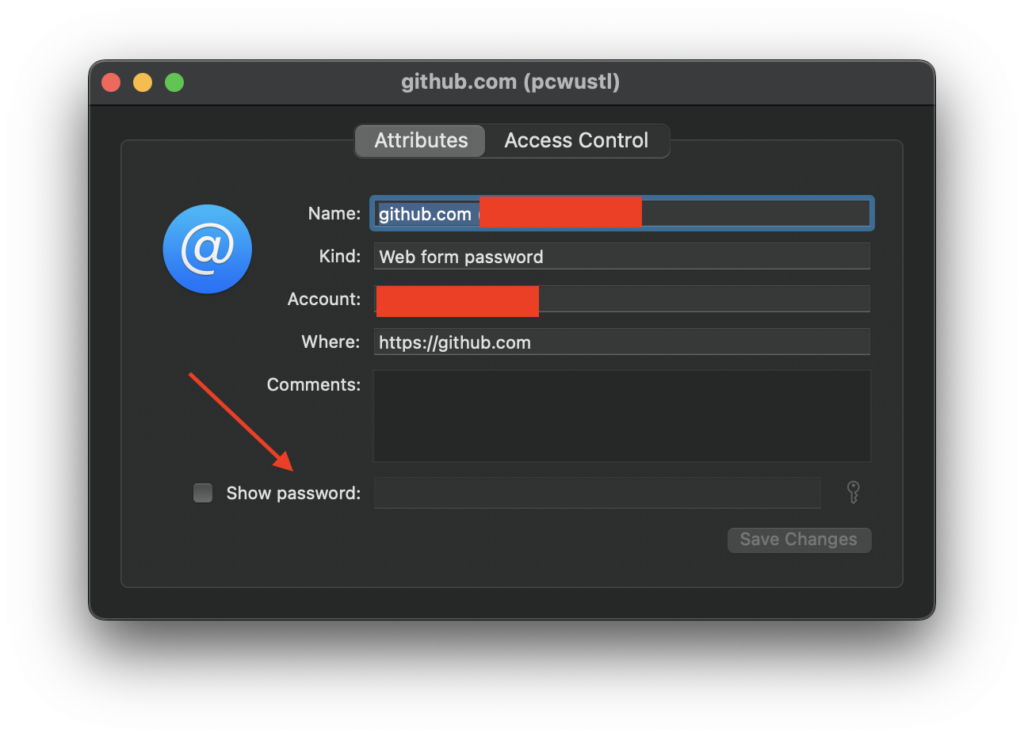
- Double-click on the GitHub entry for the account you want to push your file to.
- Click on “Show password”, input your computer account password, and then paste in the generated PAT from the previous step (instead of your GitHub password).
Using git and GitHub
Now, on to actually using git and GitHub to stage files.
First, we add our GitHub email and username to git. To do this, enter the following code:
git config --global user.email "[email protected]"
git config --global user.name "yourgithubusername"
Now we need to stage a file that we want to push to our repo. I have a file called “test.py” in a folder called “test” on my desktop. We are going to stage that file and push it to our example repo. First, we need to change directories (cd) to the location of the folder in our filesystem:
cd "/Users/username/Desktop/test"Next, we need to initialize a local repository; that is, one that is in the folder on our system:
git init
git status
Once we’ve initialized the repository, we can add the file we want to push to GitHub, in this case, “test.py”. We type:
git add test.pyNow, we can commit this file to git with a message. Adding an encompassing but concise message allows for collaborators to see what you did and for you to keep track of code changes. Type:
git commit -m "upload message"Almost done! Now we just need to “sync” our git with GitHub by “pushing” our local folder to the cloud. We first need to create a new repository in our GitHub account. From your GitHub homepage, click on the green new repository button:
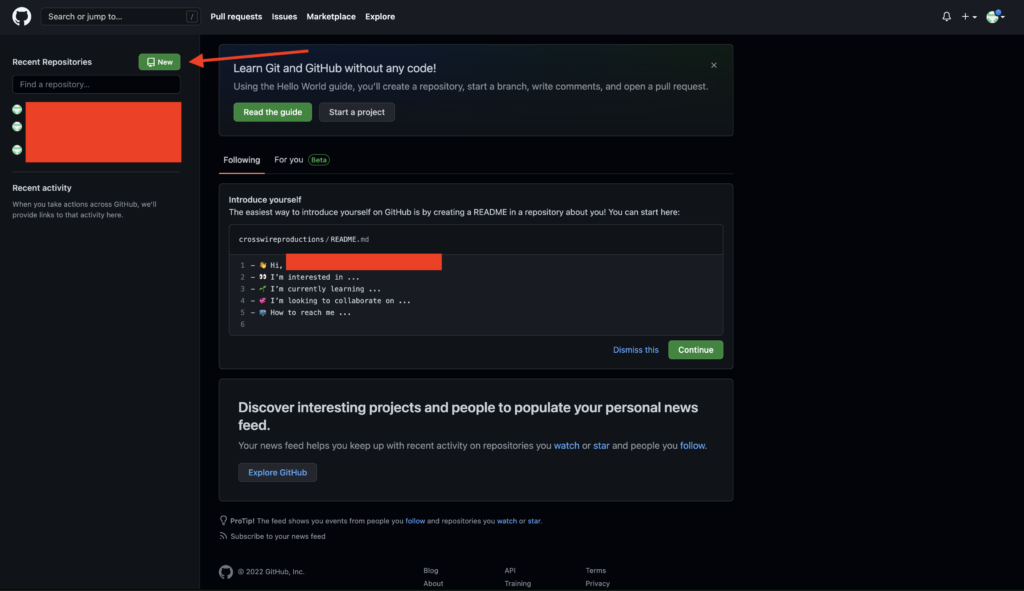
Give your new repo a name and click create. At the top of the page will be an address in HTTPS and SSH. Click on HTTPS and copy the address.
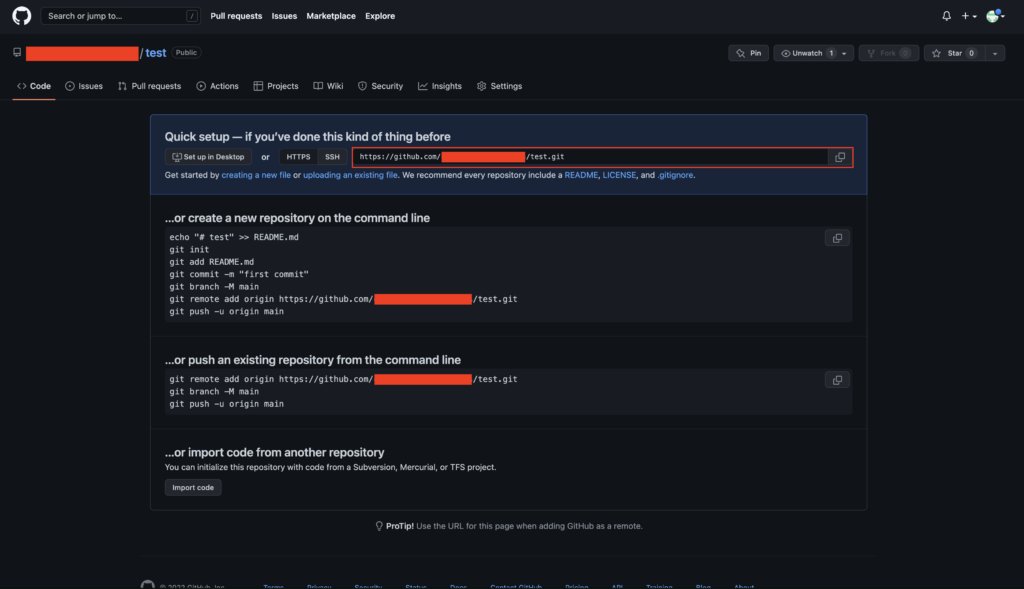
Now we can push our file to GitHub. This is done with the following two lines:
git remote add origin address
git push -u origin main
In place of address, paste in the .git GitHub address you just copied. That’s it! You’ve just pushed your file to GitHub.
Conclusion
Hopefully you now have git and GitHub set up. If I missed anything, feel free to let me know!
thanks for this!